

Introduction to CPU Load Management in Digital Audio Workstations (DAWs)
Have you ever found yourself in the middle of a creative tsunami, only to be stopped dead in your tracks by a sputtering CPU that couldn’t handle the storm? It’s the digital equivalent of a power outage at a rock concert, and it’s just as buzz-killing. Understanding CPU load in large audio sessions is crucial for music producers, especially when you’re juggling multiple tracks, plug-ins, and effects like a DJ with octopus arms.
Understanding the Significance of CPU Load in Large Audio Sessions
The CPU is the brain of your music production setup, and like any good frontman, it can only do so much before it needs a breather. When your session resembles a festival lineup more than a setlist, CPU overload becomes a real possibility. The significance? Well, unless you want your DAW to crash harder than a cymbal in a silent library, you’ll want to keep an eye on your CPU usage.
The Challenges of High CPU Demand in Music Production
High CPU demand in music production is the big bad wolf trying to blow down your studio doors. It can lead to latency, glitches, and the dreaded audio dropouts that can make any producer consider a career in something less stressful—like lion taming. This is where you start feeling the burn of those heavyweight plug-ins and high-quality samples you’ve been piling on. Now, before you toss your computer out the window in frustration, remember that the next section is all about identifying the culprits behind high CPU load. But fear not, because understanding the root of these CPU bottlenecks is the first step to reclaiming control of your workflow. Whether it’s an overzealous stack of virtual instruments or a poorly optimized project, pinpointing the issues lets you work smarter, not harder. And while high CPU demand can slow things down in the studio, advancements like 5G transforming music marketing are opening up new ways for artists to share their creations with the world faster than ever.
In Section 2, we’ll put on our detective hats and look at track counts, plug-ins, and the like, to pinpoint what’s hogging your CPU. It’s like musical forensics, but instead of fingerprints, we’re looking for digital footprints that lead to a smoother production process. So, let’s get ready to dive deep into the techy trenches of CPU load management. By the end of this jam session, you’ll be orchestrating large audio sessions with the precision of a maestro, all without breaking a CPU sweat. Keep the groove going, and let’s roll on to the next track—er, section.
Identifying the Causes of High CPU Load in Large Sessions
Now that you’re tuned in to the importance of CPU load management, let’s dissect the band members responsible for hogging the CPU stage. Like a meticulous soundcheck before the main event, pinpointing the sources of high CPU load sets the stage for a flawless performance.
High Track Counts and CPU Usage
Every track in your DAW is like an eager band member, each one chipping away at your CPU’s attention. High track counts can make your CPU feel like it’s trying to conduct an orchestra with a hundred conductors. More tracks mean more processing, and before you know it, your CPU is gasping for air like a marathon runner in a sprint race.
Effects of Plug-ins on CPU Performance
Plug-ins are the divas of the music production world. They demand high CPU resources, especially when you stack them like pancakes on a Sunday morning. From reverb to compression, each plug-in adds its own weight to the CPU’s workload. And let’s not even start on those high-end synthesizers that eat up CPU like it’s their day job.
Sample Rates, Bit Depth, and Buffer Size
Sample rates and bit depth are like the fine details in a painting – the higher they are, the more exquisite the result, but also the heavier the load. And then there’s buffer size, the buffer between your live playing and the actual processing. Set it too low, and you’ll get that annoying crackle, like popcorn in a microwave. Too high, and the latency makes you feel like you’re playing in the past.
The Impact of Virtual Instruments and Sample Libraries
Virtual instruments and sample libraries are the heavy-lifters, adding realism and complexity to your music. But they also come with a catch—they can be resource hogs, gulping down CPU power faster than a rockstar downs an energy drink before a gig. As you’ve seen, managing CPU load is like keeping a band in harmony—every element needs to be in sync. In Section 3, we’ll pull out the toolbox and fine-tune our approach with strategies for reducing CPU load. We’ll cover everything from track freezing to bouncing, and plug-in management, ensuring your sessions run smoother than a jazz solo. So, stick around, and let’s turn these CPU hogs into a well-oiled machine. By learning to optimize your workflow, you’ll not only keep your productions running efficiently but also free up headspace to focus on creativity. Whether you’re crafting the next big hit or shopping for the best Christmas gifts for musicians in your life, having a streamlined setup ensures your efforts stay inspired, not hindered. Remember, a balanced mix doesn’t just apply to sound—it’s about balancing your creative tools too! Remember, the same principles that apply to optimizing virtual instruments can often be carried over to live setups as well. In fact, some live band recording tips, like careful mic placement and recording only what’s necessary in a single take, can double up as efficiency boosters for your sessions. By combining these strategies, you’ll not only preserve CPU power but also maximize your creative potential without unnecessary interruptions.
Strategies for Reducing CPU Load
You’ve identified the CPU guzzlers, and now it’s time to whip your DAW into shape. Don’t worry; you won’t need to break out the spandex or do any heavy lifting. Instead, let’s talk savvy strategies to reduce that CPU load, so your sessions can run as smoothly as a vinyl record on a top-notch turntable.
Track Freezing and Bouncing Techniques
The Process of Freezing Tracks
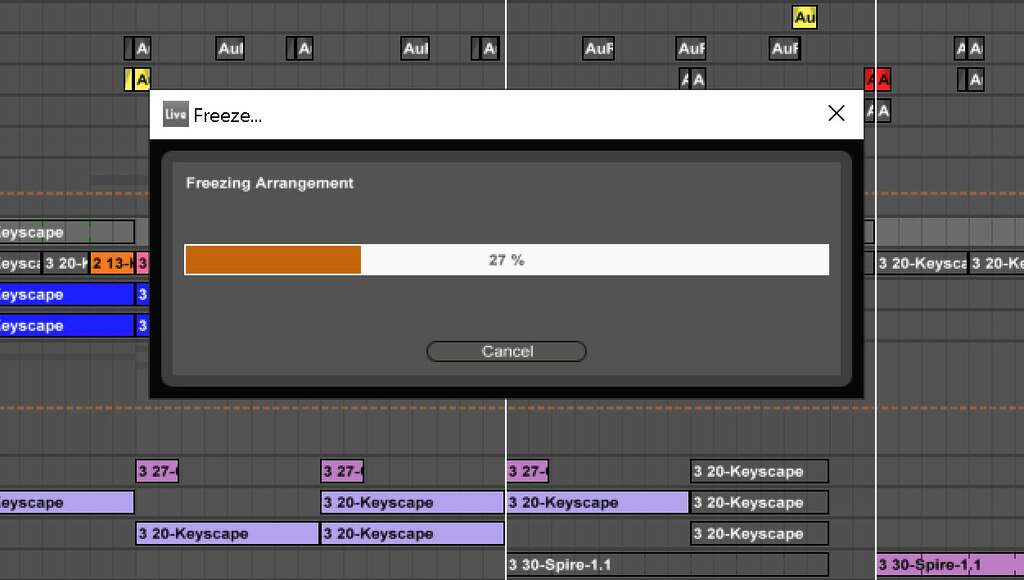
Imagine telling your tracks to take a chill pill. That’s freezing. It’s like putting hyperactive children in a time-out, so they stop wreaking havoc. By freezing tracks, you’re essentially telling your DAW to take a snapshot of the track with all its effects, freeing up the CPU to focus on other tasks. It’s a temporary fix, but it works wonders when you’re in the heat of production.
Benefits of Bouncing Tracks to Audio
Bouncing tracks to audio is the equivalent of converting your live show into a greatest hits album. You’re committing to the sound as it is, which means no more CPU drain from that track. It’s a more permanent solution than freezing, and it’s perfect when you’re sure that the take you have is the one you want to keep, like that perfect guitar solo you nailed in one shot. It’s also a great way to clear up your project and simplify your workflow, especially as sessions get more complex. By committing to the audio, you can focus on other elements, like layering harmonies or applying perfect vocal recording techniques to ensure your mix shines. This process not only enhances efficiency but also helps you stay creative without being bogged down by technical limitations.
Strategic Use of Submixes and Buses
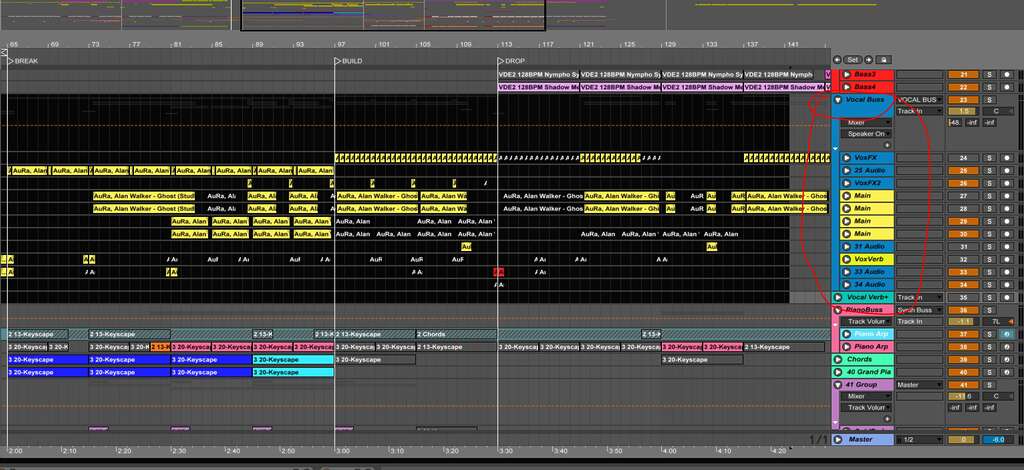
Grouping Tracks to Minimize Individual Processing
Grouping is like having a roadie for your tracks. By routing similar tracks to a bus or submix, you can apply one set of effects to the group rather than individual processing, which is a major CPU saver. Think of it as a carpool for your tracks—more efficient and environmentally friendly for your CPU.
Effective Use of Send Effects versus Insert Effects
Send effects are like communal dipping sauces; everyone can share. Instead of slathering each track with its own insert effect (like giving everyone their own ketchup bottle), send effects let multiple tracks use the same processor-heavy effects like reverb or delay. This communal approach is not only polite, but it also keeps your CPU from getting overwhelmed.
Plug-in and Virtual Instrument Management
Choosing CPU-Efficient Plug-ins
Not all plug-ins are created equal. Some are lean, mean, processing machines, while others are bloated CPU hogs. Choosing CPU-efficient plug-ins is like picking athletes for your track team—you want the ones that will give you the best performance without tiring out halfway through the session.
Balancing Real-Time and Pre-Rendered Virtual Instruments
Virtual instruments can be demanding divas on your CPU’s resources. Balancing real-time playback with pre-rendered instruments can save your CPU from a meltdown. It’s a bit like meal-prepping for the week; by doing some of the work upfront, you save time and stress later. As we’ve seen, managing CPU load doesn’t require a degree in rocket science, just some clever maneuvering and strategic planning. Up next, in Section 4, we’ll dive into optimizing DAW settings for CPU efficiency. You’ll learn how to tweak the nuts and bolts of your DAW to ensure it’s running as efficiently as a Swiss watch. Get ready to tinker under the hood—we’re going to optimize our way to a smoother session.
Optimizing DAW Settings for CPU Efficiency
After tightening the reins on your high CPU load with some clever strategies, it’s time to fine-tune the engine of your DAW for peak performance. Think of it as giving your studio setup a nitro boost without the risk of blowing the speakers. Let’s roll up our sleeves and get into the nitty-gritty of optimizing DAW settings for CPU efficiency.
Adjusting Buffer Size and Sample Rate for Performance
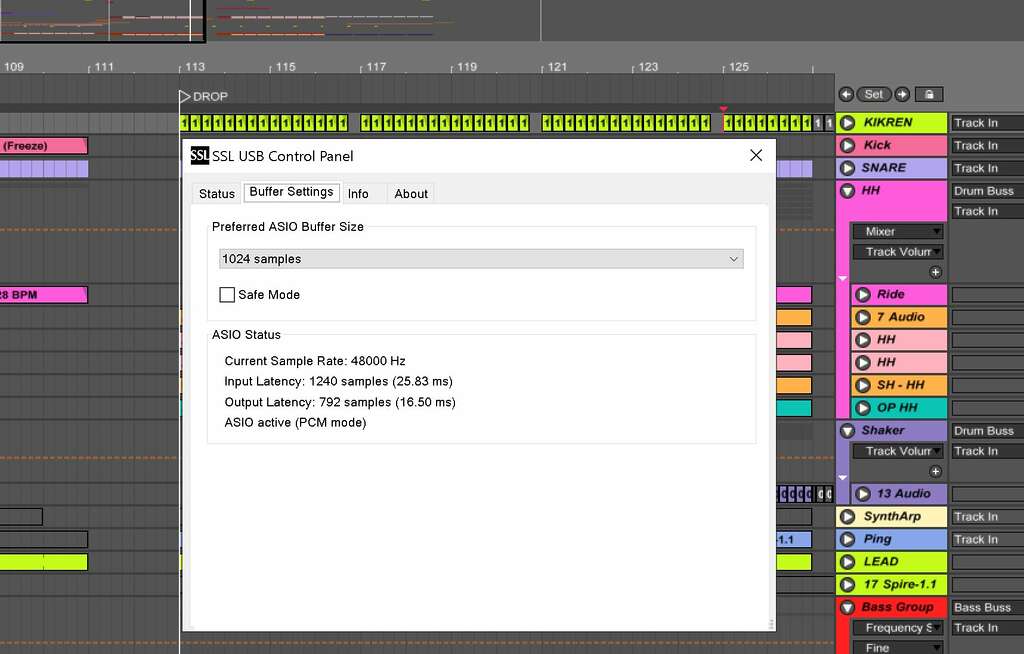
Buffer size and sample rate adjustments are like finding the sweet spot on your studio chair—it needs to be just right. A buffer size that’s too low can cause crackles and pops, like a vinyl record with attitude, while setting it too high might create latency, making you feel like you’re producing beats in slow motion. Strike a balance that keeps the audio quality crisp without making your CPU break into a sweat. Similarly, sample rates are a delicate dance. Higher rates mean better sound quality but at the expense of your CPU’s sanity. Unless you’re producing the next interstellar anthem, consider if you really need those extra hertz or if you’re just showing off to your audiophile friends.
Utilizing Multi-Core Processing and Threading Options
Today’s CPUs are like octopuses, with multiple cores ready to handle several tasks at once. DAWs that support multi-core processing can distribute the load across these cores, preventing any single one from becoming the audio equivalent of a traffic jam. By enabling and optimizing multi-core support, you’re essentially giving your tracks their own personal lanes on the CPU highway.
Selective Track Enablement for Focused Workflows
Selective track enablement is like playing musical chairs with your tracks. By disabling tracks that are not currently in use, you can give your CPU a breather. It’s like telling some of your band members to take five while you work on a killer solo. This focused approach allows you to concentrate your CPU’s power on the tracks that need it most. Now, with your DAW finely tuned and your CPU running like a dream, you’re ready to push the boundaries even further. In Section 5, we’ll explore advanced techniques for managing CPU load, diving into the world of automation, resource allocation, and the elusive art of proxies and low-resolution workflows. Fasten your seatbelts, because we’re about to go deep into the tech that will keep your sessions as smooth as a jazz musician’s riff.
Advanced Techniques for Managing CPU Load
You’ve tuned your DAW’s settings like a fine piano, and now it’s time to pull out the big guns—or should I say, the smart tools? Advanced techniques for managing CPU load are like secret recipes for audio chefs: they can turn a mixing session from a CPU-overload nightmare into a smooth-running dream. Let’s slice and dice our way through these high-level strategies, ensuring your music production is as effortless as a maestro conducting a symphony.
Automation to Disable Unused Plug-ins and Tracks
It’s time to play the automation game. Automation isn’t just for volume and pan anymore; it’s also a CPU load lifesaver. Like a vigilant bouncer at a club, automation can disable unused plug-ins and tracks that aren’t contributing to the current mix, ensuring that only the essential elements are sapping your precious CPU power. This means your CPU can kick back and relax instead of running the marathon on every playthrough.
Resource Allocation for Critical Track Processing
Not all tracks are created equal. Some demand the VIP treatment, while others can hang out in the background. Resource allocation is about prioritizing the CPU’s attention for tracks that matter most—like giving the lead vocalist the spotlight while the tambourine player chills in the shadows. By focusing your CPU resources on the critical elements, you ensure that your stars shine without a hint of a performance hiccup.
Exploring the Benefits of Proxies and Low-Resolution Workflows
Now, let’s talk about proxies and low-resolution workflows. They’re the digital equivalent of sketching before painting; you work with a rough, less CPU-intensive version of your project before switching to the full-resolution files for the final touches. This technique is like rehearsing with stand-ins before the main actors take the stage, allowing you to get the framework right without straining your system. Armed with these advanced tactics, your CPU load should feel lighter than a feather on a breeze. But what about the physical gear that houses all this wizardry? In Section 6, we’ll venture into the realm of hardware considerations and upgrades. Because sometimes, even the best software tricks can’t beat a good old-fashioned hardware boost. So, get ready to pop the hood and supercharge your setup with some silicon nitrous.
Hardware Considerations and Upgrades for CPU Management
After fine-tuning our software strategies to handle the CPU load in a digital audio workstation (DAW), let’s peek under the hood and see what hardware magic we can conjure up. It’s time to roll up our sleeves and get a little grease on our hands because, in the world of music production, the right gear can make your CPU sing like a vintage tube amp on a Saturday night. This means considering everything from faster processors and more RAM to ensuring your hard drives can keep up with recording and playback demands. Beyond the core components, understanding how external gear like audio interfaces and the types of microphones in audio recording impact your workflow can truly elevate your creative process. When your hardware and software are in harmony, your studio becomes a well-oiled machine ready to turn every idea into a sonic masterpiece. When diving into the best digital audio workstations 2024, it’s clear that pairing them with the right hardware is a game-changer. From faster SSDs to ensure lightning-quick file access, to selecting a CPU with enough cores to handle dense plugin stacks, the synergy between your gear and software can directly influence your creative flow. After all, even the most cutting-edge DAW deserves a hardware setup that keeps up with its potential. From upgrading your RAM to investing in an SSD for faster load times, every tweak can bring you closer to seamless production. But before diving into premium hardware, don’t overlook the DAW essentials for beginners—a reliable audio interface, a decent pair of headphones, and a MIDI controller can already set the stage for creative breakthroughs. With the right combination of gear and know-how, you’ll be ready to turn your musical ideas into polished tracks.
The Role of CPU Specs in Audio Processing
Think of your CPU as the lead vocalist in the band that is your computer. If it’s not up to the task, your entire mix could fall flat. The role of CPU specs in audio processing is critical—core count, clock speed, and cache size are the high notes you need to hit for a smooth performance. Upgrading to a faster, multi-core processor can keep your session running smoother than a jazz solo on a quiet night.
Importance of RAM and Fast Storage
RAM is the stage crew behind the scenes, setting up and breaking down your virtual instruments and plugins so they’re ready to perform at a moment’s notice. Skimp on RAM, and you’ll find your DAW struggling to keep up with scene changes. And let’s not forget storage—upgrading to an SSD can speed up load times like a roadie on double espresso, making sure your samples are cued up faster than you can say “drop the beat.”
Evaluating the Need for External DSP Processing Units
For those really heavy sessions, sometimes you need to call in the reinforcements. External DSP processing units are like the session musicians you hire to take the load off your main band. They handle the effects and processing, leaving your CPU free to focus on mixing and arranging without breaking a sweat. It’s an investment, sure, but one that can pay off in spades when you’re knee-deep in tracks and plugins. As we gear up with the latest in hardware tech, we’re setting the stage for even more advanced tactics in managing CPU load. In Section 7, we’ll shift our focus to the external tools and services that can expand our production capabilities beyond the confines of our local setup. Think of it as taking the show on the road, tapping into a world of resources that keep our sessions running smoothly, no matter how complex the arrangement gets. So, keep your tuner handy and your cables coiled; we’re about to plug into a whole new level of production prowess.
Best Practices for Large Session Management
So, you’ve got your CPU humming like a finely-tuned engine after navigating the hardware jungle and embracing the power of external processors. But, as any seasoned audio mechanic knows, a sleek machine alone doesn’t win the race—it’s how you drive it. Let’s shift gears and talk best practices for large session management, ensuring your DAW doesn’t throw a rod when the tracks start piling up.
Planning and Organization in Session Layout
Before you even lay down that first kick drum, take a beat to plan your session layout. Think of it as a road map for your mix—knowing where each element sits in the sonic landscape can save you from a traffic jam later on. Proper planning and organization mean labeling tracks, color-coding, and grouping similar elements. It’s not just about aesthetics; it’s about avoiding a mix-up that could have you pulling your hair out faster than a guitarist shreds a solo. A clean and organized session sets the stage for efficiency, letting you focus on what truly matters—the art of creating great mixes. By streamlining your workflow from the start, you leave more brainpower for critical decisions like balancing levels and shaping tones. After all, even the most creative ideas can get lost in the chaos if your session feels like a hurricane of unlabeled tracks and mismatched settings. This foundational step sets you up for a smoother workflow, ensuring you can focus on the creative process rather than digging through a chaotic session. Whether you’re layering synths or enhancing music with field recordings, a clean layout allows you to easily locate and tweak elements without breaking the flow. Think of it as building the scaffolding for your artistry—strong organization lets the music shine, free from any unnecessary distractions.
Adopting a Minimalist Approach to Plug-in Usage
When it comes to plugins, think of them like hot sauce—a little can go a long way. Adopting a minimalist approach to plug-in usage can keep your CPU from overheating while ensuring each effect serves a purpose. It’s about being selective, like choosing the right pedal for your guitar solo, not stomping on every box you own. Less can indeed be more when it means a smoother session and a more focused sound.
Regular Housekeeping and Maintenance Routines
Maintaining a clean session is like keeping your studio tidy—it’s not the glamorous part of the job, but it’s essential. Regular housekeeping and maintenance, like clearing out unused tracks and archiving old sessions, can prevent your DAW from becoming a digital hoarder’s paradise. This discipline keeps your workflow streamlined and your CPU load lighter than a featherweight boxer on weigh-in day. As we’ve dusted off the mixer and polished the faders, the path to maximizing workflow efficiency and CPU resources in Section 9 becomes clear. We’re not just pushing faders; we’re crafting a strategy that ensures our DAW sessions are as smooth as a vinyl record’s groove. The final track awaits, where we’ll recap the techniques that keep our digital studios running like dream machines and our creativity flowing without a CPU care in the world.
Conclusion: Maximizing Workflow Efficiency and CPU Resources
After spinning through the labyrinth of managing CPU load in your DAW, you’re probably feeling like a bit of a tech wizard—or maybe just exhausted from juggling all those plugins and tracks. But before you collapse into a heap of patch cables and USB drives, let’s take a moment to hit the recap button on our CPU load management mixdown.
Recap of Key Techniques for Managing CPU Load
Remember that time your session crashed harder than a drummer after an all-night gig? We’ve been there. That’s why we’ve hammered out the key techniques to keep your DAW as smooth as a jazz solo. Freezing tracks? Check. Strategic submixes? You bet. And let’s not forget the CPU-saving grace of bouncing tracks to audio. By now, you should be a pro at making those plugins behave and getting those virtual instruments to play nice with your CPU.
Embracing a Proactive Approach to Session Management
Let’s face it, a cluttered session is like a messy studio—nobody’s got time for that. Being proactive is the name of the game. Organize those tracks, trim the fat on plugin use, and stay vigilant with regular DAW housekeeping. This isn’t just about keeping your CPU cool under pressure; it’s about crafting a workflow that’s as efficient as a factory line, but way more fun. And as we put a pin in our CPU load odyssey, we’re not just closing a chapter; we’re gearing up for the next. The FAQs on managing CPU load in large sessions are lurking just around the corner, ready to tackle those burning questions and common head-scratchers. From immediate overload fixes to the benefits of external DSP, we’re about to crack open the treasure chest of knowledge nuggets. So, let’s not dawdle on the buffering wheel of despair. It’s time to take these CPU load management strategies, make them your own, and keep the music flowing. Because at the end of the day, it’s all about the music, and with a well-oiled DAW, your creative possibilities are as limitless as your playlists.
It seems there’s been a bit of a mix-up with the section numbers provided. However, following the given outline and the instructions to create Section #10, I’ll craft a section titled “FAQs on Managing CPU Load in Large Sessions,” which logically follows the previous section “Conclusion: Maximizing Workflow Efficiency and CPU Resources.”
FAQs on Managing CPU Load in Large Sessions
Every music producer has been there: you’re in the groove, the tracks are flowing, and suddenly your DAW hits you with the spinning wheel of doom. CPU overload can be the buzzkill of any session, but fear not, for we’ve compiled the most burning questions and their answers to keep your workflow smoother than a vinyl record. Whether you’re working with dozens of plugins or stacking virtual instruments, knowing how to optimize your setup can save you from countless headaches. From freezing tracks to upgrading hardware, there are plenty of ways to minimize interruptions and keep your creativity alive. And if your home setup isn’t cutting it, searching for “recording studios near me” can unlock access to professional gear and acoustics to take your production to the next level.
What are some immediate actions to take when experiencing CPU overload?
First, don’t panic. Start by checking your high-CPU plugins and consider bypassing non-essential ones. Utilize track freezing or bouncing to audio to ease the load. It’s like telling your DAW to take a chill pill so you can continue the jam session without any hiccups.
How does increasing buffer size affect CPU load and latency?
Imagine buffer size as the DAW’s breathing room. Increasing it gives your CPU more time to process audio, reducing the load but also adding latency. It’s a balancing act, like finding the perfect level on your guitar amp. Too low, and you’re in overload city; too high, and you might as well be playing in the next room.
Can upgrading a computer’s RAM significantly improve CPU load issues?
Absolutely! RAM is like the stage for your DAW’s plugins and tracks to perform. More RAM means a bigger stage, allowing more simultaneous performances without tripping over each other. It’s not a silver bullet, but it sure can turn a cramped club gig into a stadium tour for your DAW.
Are there differences in how various DAWs handle CPU load?
Sure, just like how every musician has their quirks, every DAW has its way of handling the spotlight. Some are optimized for multi-core processors, while others might be more memory-hungry. It pays to know your DAW’s personality to get the best performance out of your setup.
What are some common mistakes that lead to unnecessary CPU usage in sessions?
Overloading your session with plugins is like a rookie guitarist stepping on every pedal they own. Use sends for reverb and delay, commit to sounds by bouncing, and keep an eye on those virtual instrument settings. Remember, simplicity is the keynote of true elegance in a session.
How can I measure the CPU load of individual plug-ins?
Many DAWs have a built-in CPU meter that shows the usage per plugin. It’s like having a fuel gauge for each effect or instrument, so you can see who’s guzzling the gas and who’s just sipping.
What is the benefit of using external DSP hardware instead of native processing?
Using external DSP is like having a second engine in your car. It takes the heavy lifting off your main CPU, allowing you to run more plugins without taxing your computer’s core. It’s not necessary for everyone, but it’s a game-changer for those running high-track-count sessions.
Is freezing tracks a permanent change to my session?
Not at all. Freezing tracks is like putting your instruments in their cases while on a break. You can always unfreeze and tweak settings later. It’s a temporary fix to keep the music flowing.
Can I use multiple computers to distribute the CPU load of a session?
In the age of networked computers, it’s like having a band where each member plays from a different stage. With the right setup, you can offload certain tasks to other computers, allowing you to expand your production without overloading a single system. Ready for more? Up next, we’re diving into the possibilities that lie beyond CPU management. Stay tuned for the next section, where we’ll explore cutting-edge developments and futuristic insights that continue to shape the landscape of music production. It’s like looking into a crystal ball, but for your DAW. This forward-thinking approach not only boosts efficiency but also opens up new creative pathways, giving producers more flexibility to experiment and innovate. But while technology evolves, staying connected with your audience remains key—mastering social media tips for producers can help you showcase your work and build a loyal following. After all, in a world where visibility is everything, blending tech-savvy production with smart networking strategies is the ultimate combo for success. With advancements in technology, the opportunities are limitless, and collaboration between machines and creativity has never been more exciting. AI in music production is transforming the way artists compose, mix, and master music, offering tools that can analyze, generate, and even enhance tracks with minimal input. These innovations are not about replacing the human touch but amplifying it, making the future of music a thrilling blend of art and artificial intelligence.
Utilizing External Tools and Services
After fine-tuning our in-DAW strategies for CPU load management, let’s step outside the box—literally. External tools and services can be a lifesaver when your session’s CPU meter is redder than a stop sign at rush hour. But how can these high-tech lifeboats keep your production afloat? Let’s dive in.
Leveraging Networked Computers for Additional Processing Power
Imagine your computer’s CPU is like a single chef in a restaurant kitchen; when the orders pile up, dishes start coming out late, or worse, burnt. Now, what if you could call in a few extra chefs to help? That’s the magic of networked computers. Using systems like Vienna Ensemble Pro or Avid’s Satellite Link, you can spread the workload across multiple machines, turning your solo kitchen nightmare into a well-oiled culinary team. And the best part? You don’t have to deal with Gordon Ramsay-level meltdowns.
Cloud-based Processing Solutions for Audio Work
If networking computers sounds as daunting as setting up a home Wi-Fi network (we’ve all been there, right?), cloud-based processing might just be your ticket to a stress-free session. Companies like Audiomovers and Splice have stepped into the arena, offering cloud processing power that’s as easy to access as streaming your favorite sitcom. With these services, you can offload heavy-duty tasks like reverb and mastering to the cloud faster than you can say “latency-free audio streaming.” It’s like having your own audio butler in the sky, ready to take the load off your shoulders. With these external aces up your sleeve, you’re now armed to tackle even the most monstrous of sessions without breaking a sweat—or your CPU. But wait, there’s more! As we march to the beat of our digital drum, the next section lays out the best practices for large session management. It’s not just about having the right tools; it’s about using them with the wisdom of a studio sage and the precision of a classical maestro. So, stay tuned, because we’re about to take this CPU symphony to a harmonious crescendo. Whether you’re a seasoned producer or just getting started, leveraging resources like workflow checklists and top podcast picks for musicians can provide invaluable insights to streamline your sessions. These tools not only inspire creativity but also help you stay organized, ensuring every element of your masterpiece falls seamlessly into place. So gear up, because your audio journey is about to hit all the right notes—powered by innovation, efficiency, and a dash of creative genius. And as the digital landscape evolves, integrating tools like monitoring solutions for live musicians ensures that every note and nuance is executed flawlessly in real time. These innovations not only enhance your creative process but also foster collaboration, letting you focus on making music rather than troubleshooting tech. So gear up, because with the right approach, those once-intimidating mega sessions will soon feel like a breeze—seamless, efficient, and totally in tune with your creative vision.